A website how-to for broke filmmakers.
Goals
- Take money away from WIX, Squarespace and other extortionately expensive services.
- A desire to get people to build stuff.
- Reduce some of the complexity traditionaly driving people to pay for 'all in one services'
Fundamentals
Can’s and Cannot’s
The main reason it’s inexpensive is that it’s a static website, essentially an interactive PowerPoint presentation. This makes it ideal for a portfolio or blog, but not much else.
Tools and services used
One benefit is that all the services are interchangeable and can be swapped for alternatives if a company’s pricing policies change. This provides much more freedom compared to relying on a single system.
There are 4 key components going into this method:
- Bootstrap Studio, Blocs or Webstudio
- Github
- Netify
- Cloudflare
The Website Builder
This is where the website is designed and then exported for upload to GitHub.
Can be interchanged with any tool (preferably offline) that can export a static website.
The tools I would recommend are:
- Bootstrap Studio (Paid) (Windows and Mac)
- Blocs (Paid) (Mac)
- Webstudio (Free) (Windows and Mac)
All of these tools do NOT rely on a subscription model. And could in theory be available for free 😉
Code Repository
GitHub is really the primary option here, although other alternatives exist. It serves as the storage for the code, which is accessible to Netlify, and also allows code to be rolled back to a previous version if needed.
Content Delivery Network
Netify is the service that distributes the code to the internet - it gives you 100GB per month for free, which should be more than enough.
Domain Registrar
Finally, CloudFlare is the cheapest place I’ve found to buy a domain for around 9.77 US$/year. I also feel they are the most straightforward when it comes to pricing without offering a year one discount, etc.
How-To ish
I will try to explain the core concepts of getting a website online.
Since I’ve recommended three different website builders, I’ll keep the information concise, focusing primarily on Bootstrap as a shared framework between Blocs and Bootstrap Studio. This should cover the major elements. I’ll also list a few good YouTube channels below for further guidance—or, of course, you can always turn to Google if you’re stuck :)
Step 1 - Building a site and exporting it.
Step 1.1 - Website set up and Themes
Step 1.2 - Parts of a website
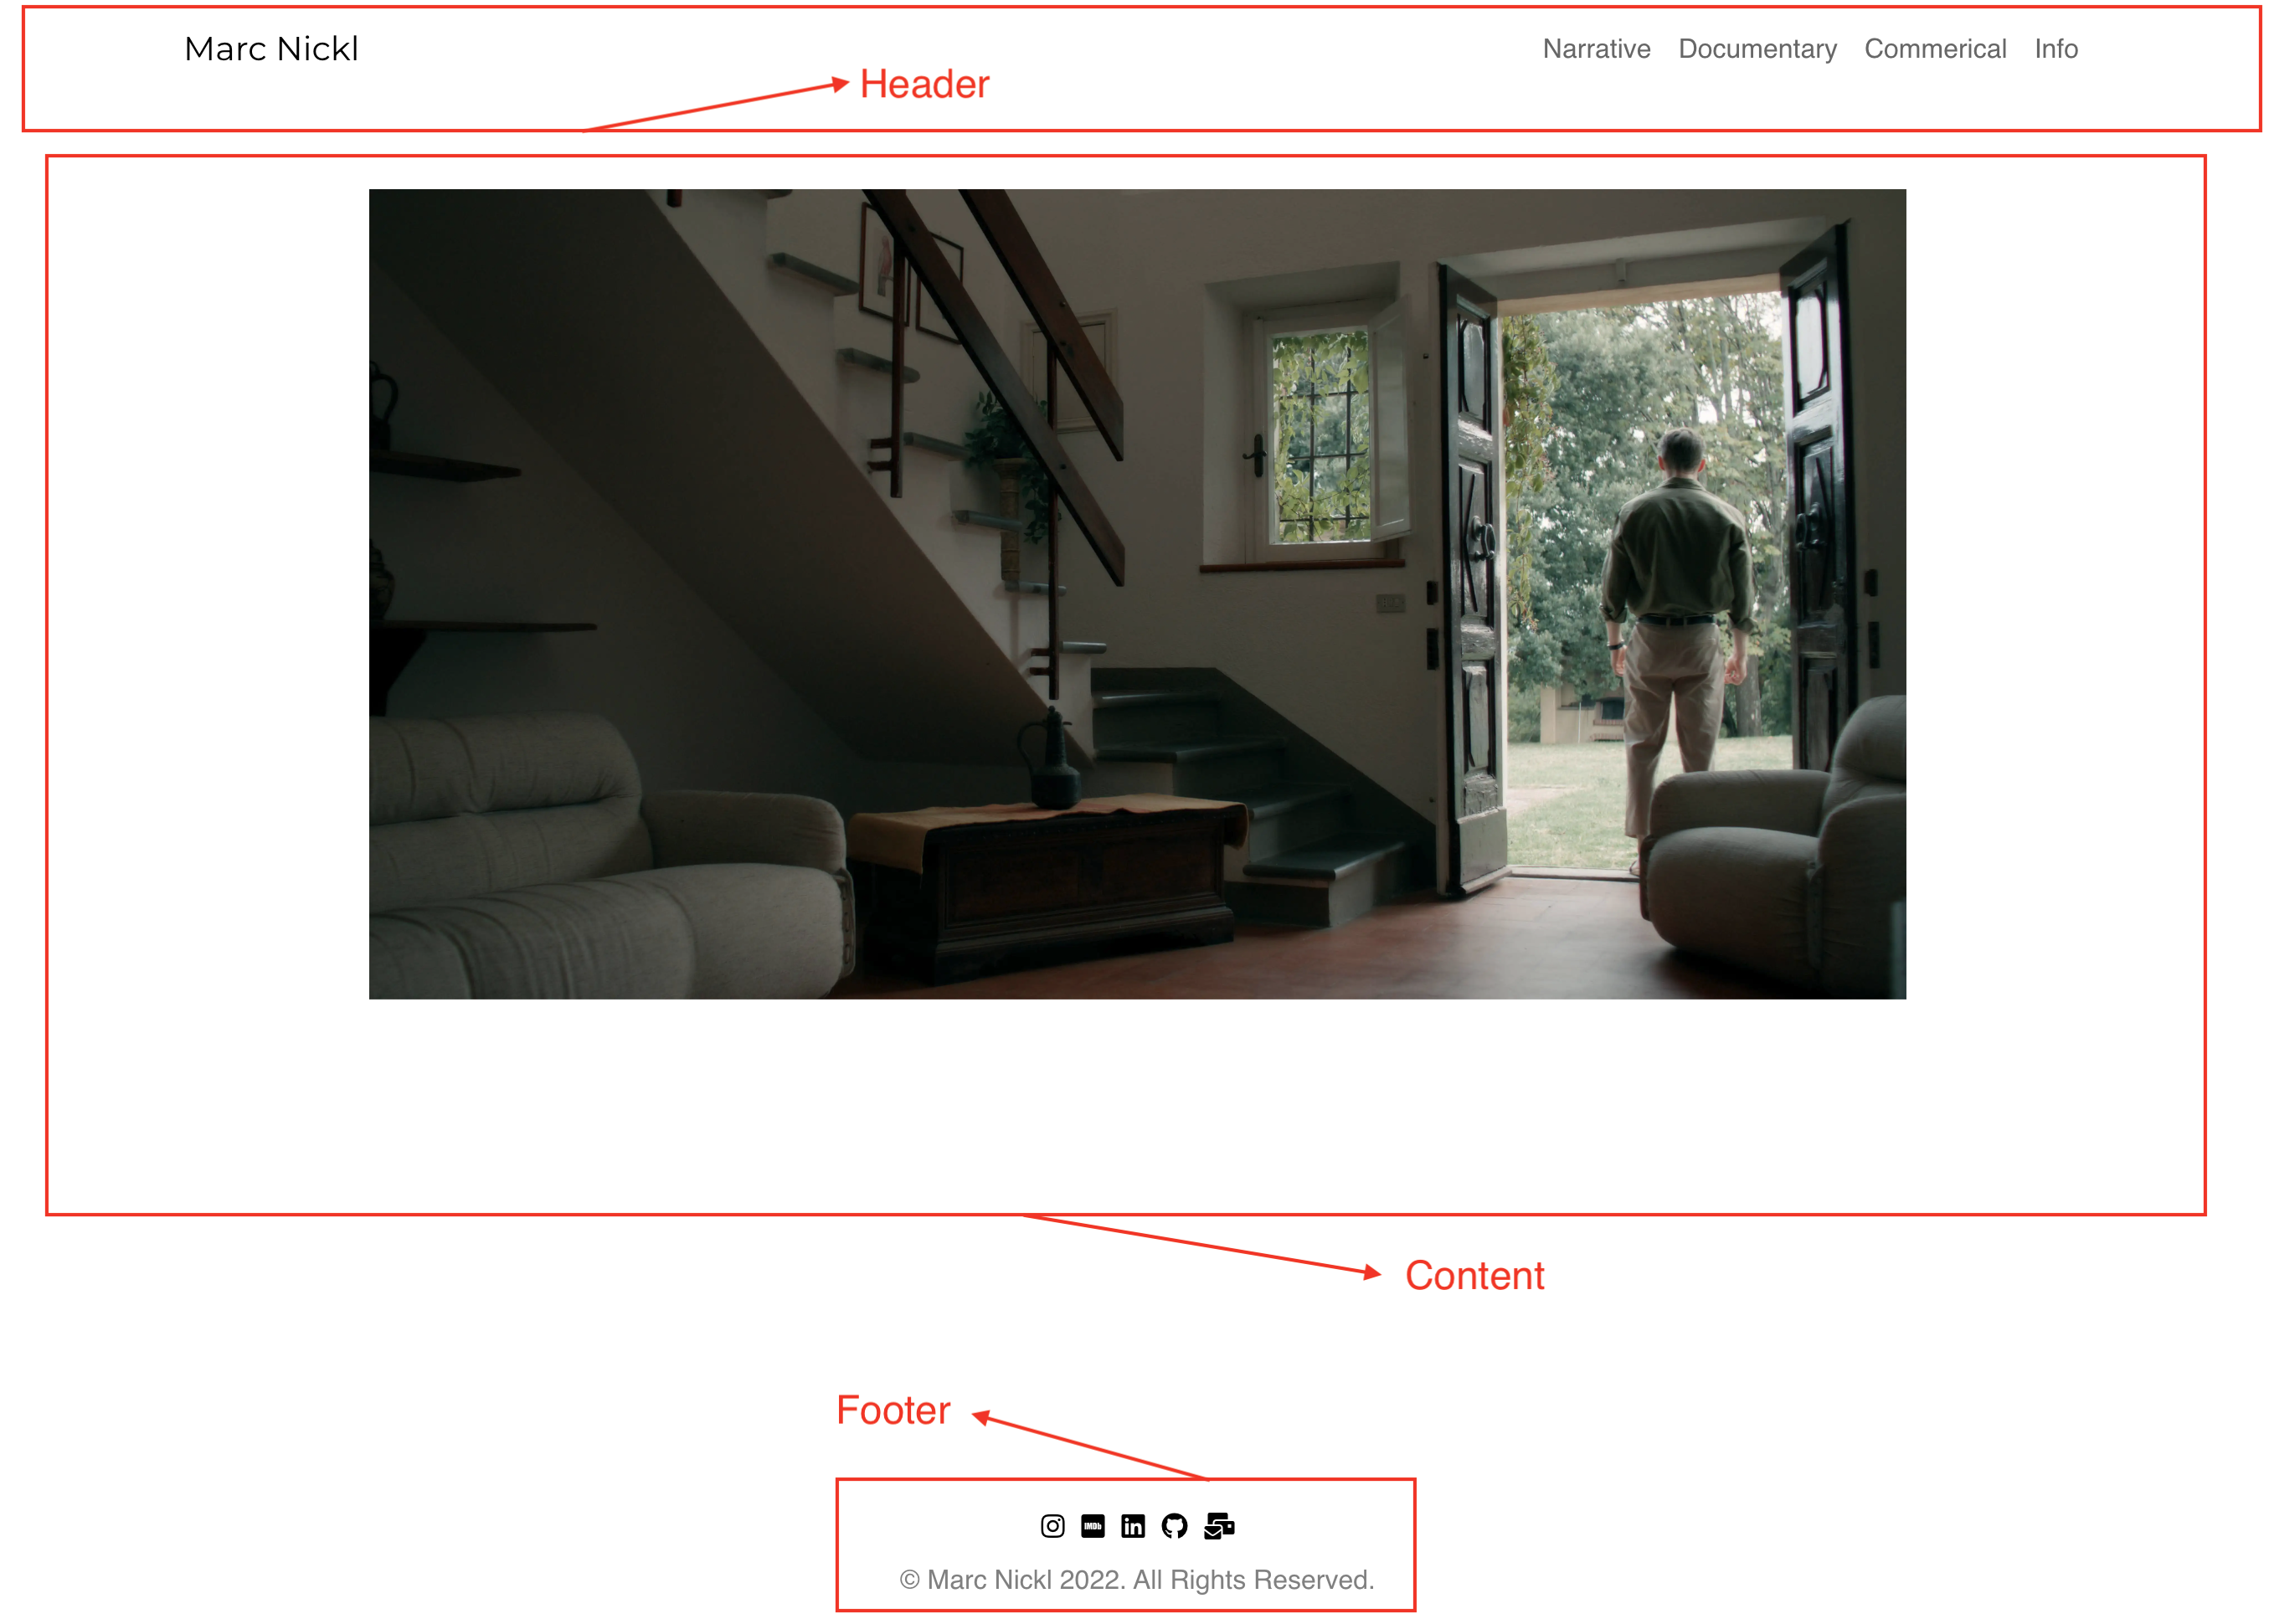
Navbar and Header
Content
Rows
Columns
Embeds
Footer
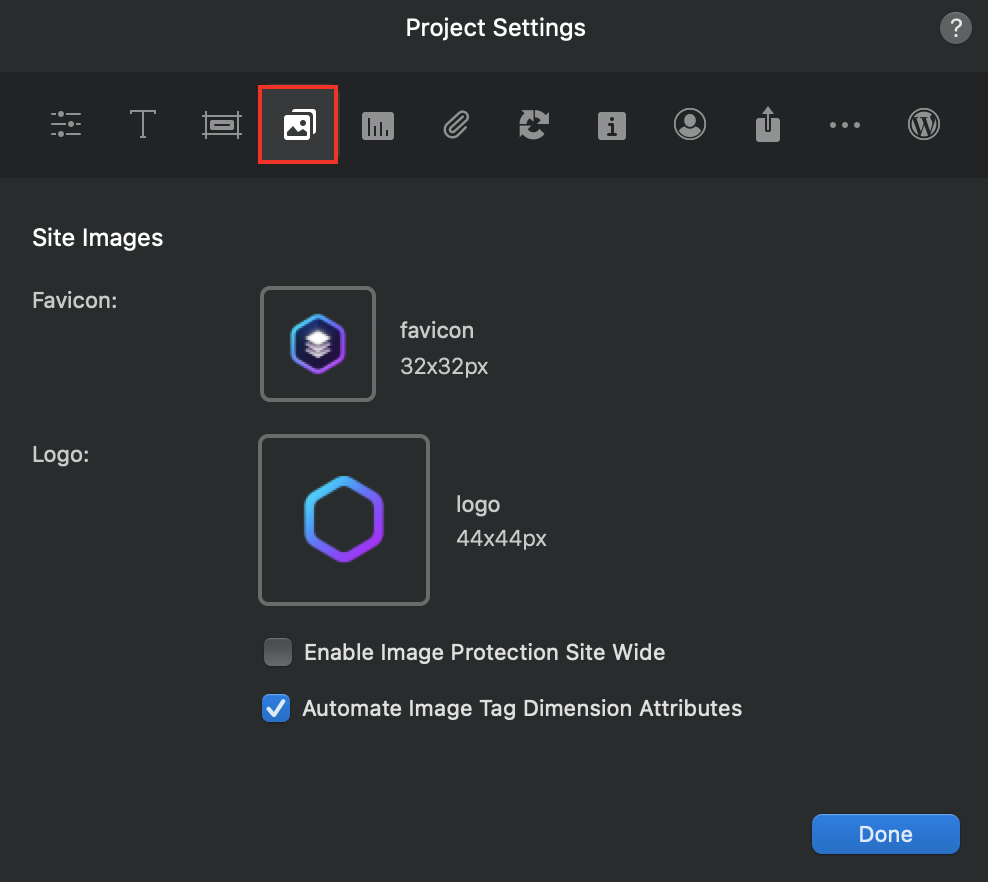
Favicons
Tiny icon that makes a website look a tad bit cooler

Do add or modify the favicon - it tends to be set by default as the website builders logo.
To set it up in blocs its as simple as going to the settings and adding your own. - do make sure to use a square image otherwire blocs will streach it to fit.
Step 2 - Setting up a GitHub Repo and uploading
Step 2.1 - GitHub
In theory its possible to completely skip Github as a service and directly upload the website to Netify but GitHub offers a rollback feature if there is a mistake as well as keeps track of all the changes done.
When you have a GitHub account set up. You'll need to make a repository. Just make sure to give it a funny name and make it private.
Step 2.2 - GitHub desktop Setup
Then you'll need to download github desktop. This makes it really easy in the future to update the website.
- https://desktop.github.com/download/
When GitHub is installed you can clone/sync the reprository that you've made. Just Select a Location that is easy to find. 'Documents' is usually a nice place.
Step 2.3 Exporting
When you’re ready to export the website as code, be sure to export it to the same location as the folder created by GitHub Desktop. This allows the program to detect changes and upload only the necessary code.
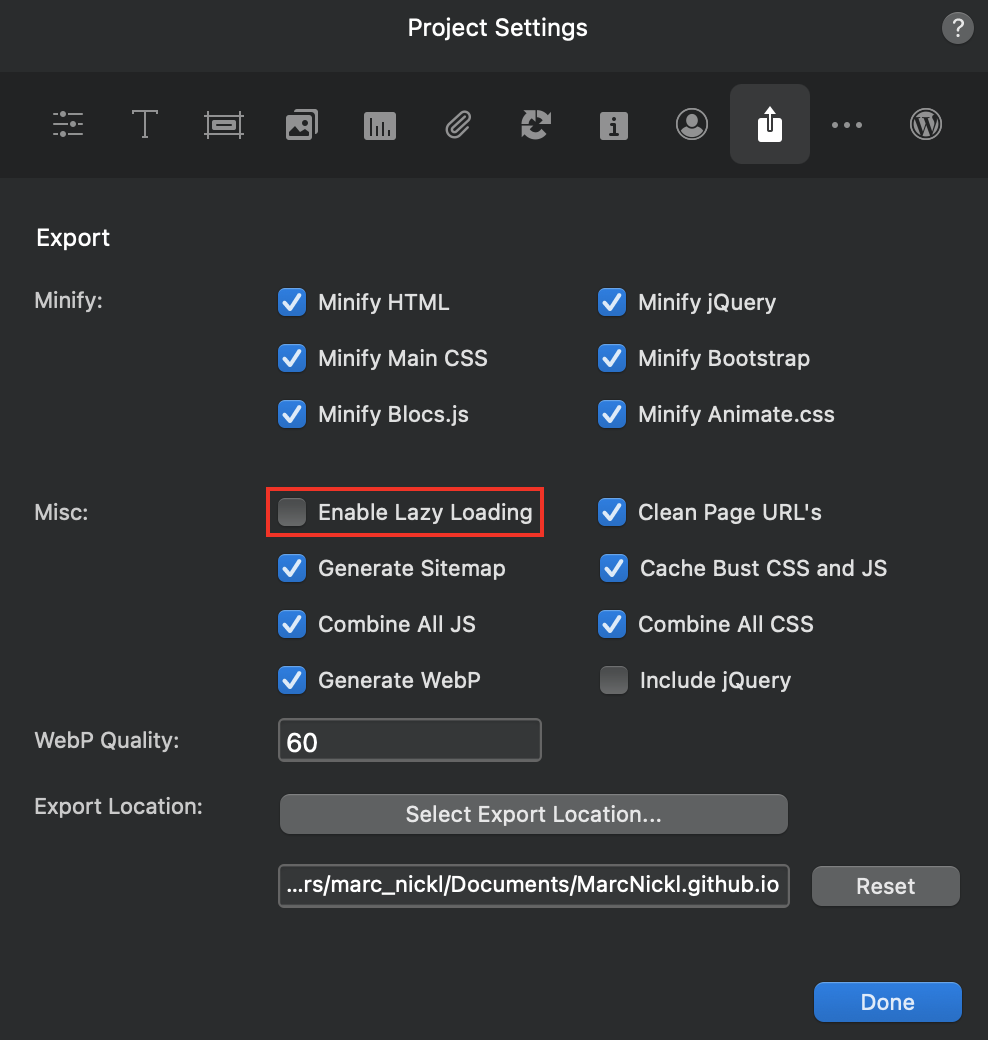
In the export settings, I recommend selecting the option to convert images to ‘webp’ format, as this reduces bandwidth usage and speeds up your website’s loading time.
If you notice that only some parts of your website load in the future, consider disabling lazy loading as well.
Step 2.4 - GitHub Desktop Upload
Now you should see that a bunch of code has been added. Code that is added is indicated in green and code that has been removed is indicated in red.
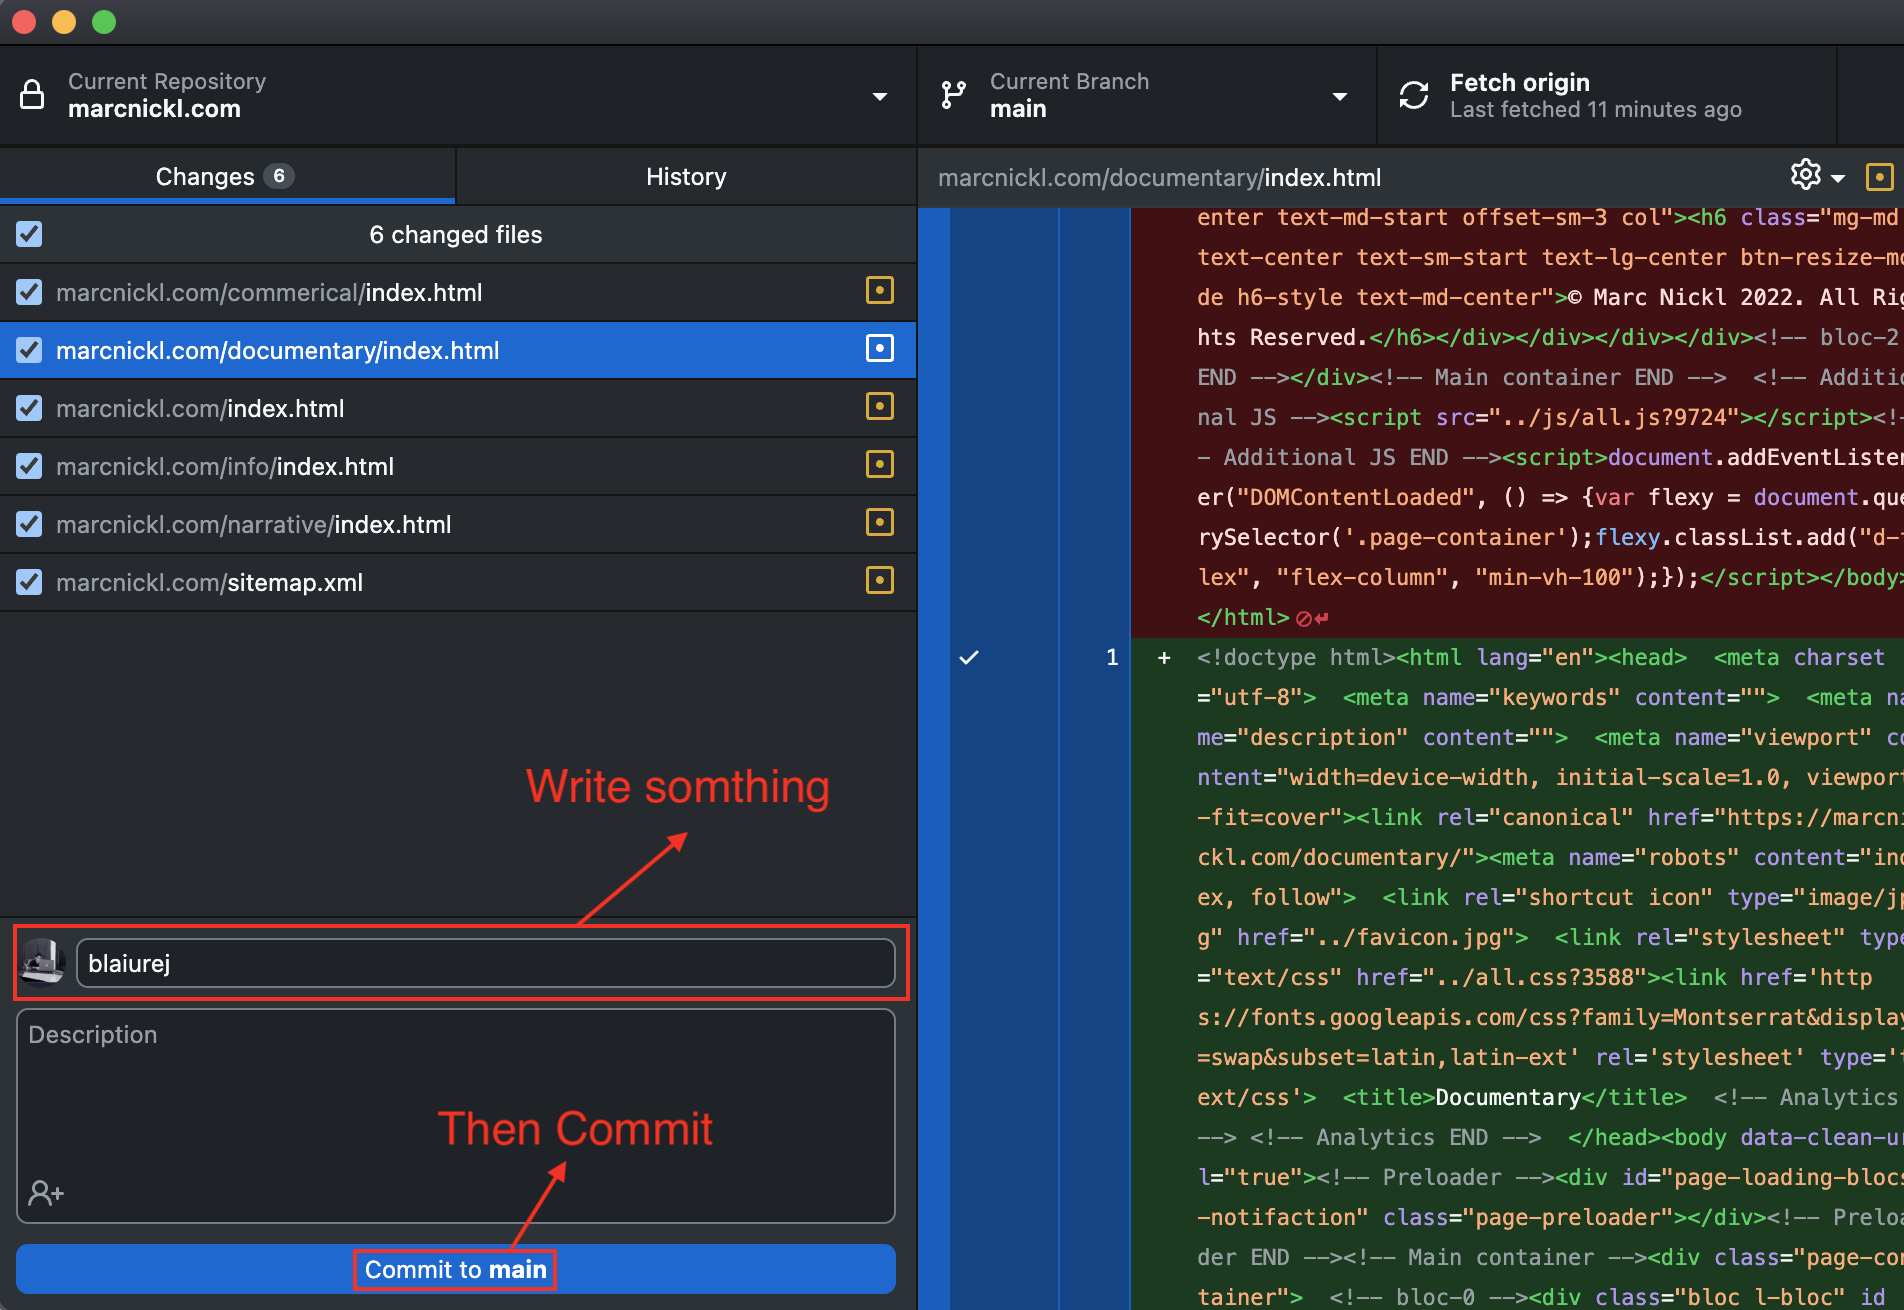
You'll need to write a summery this will be your title for this bunch of changes. Depending on your OCD you'll be acurate and this will be helful or a bunch of gibberish is also ok.
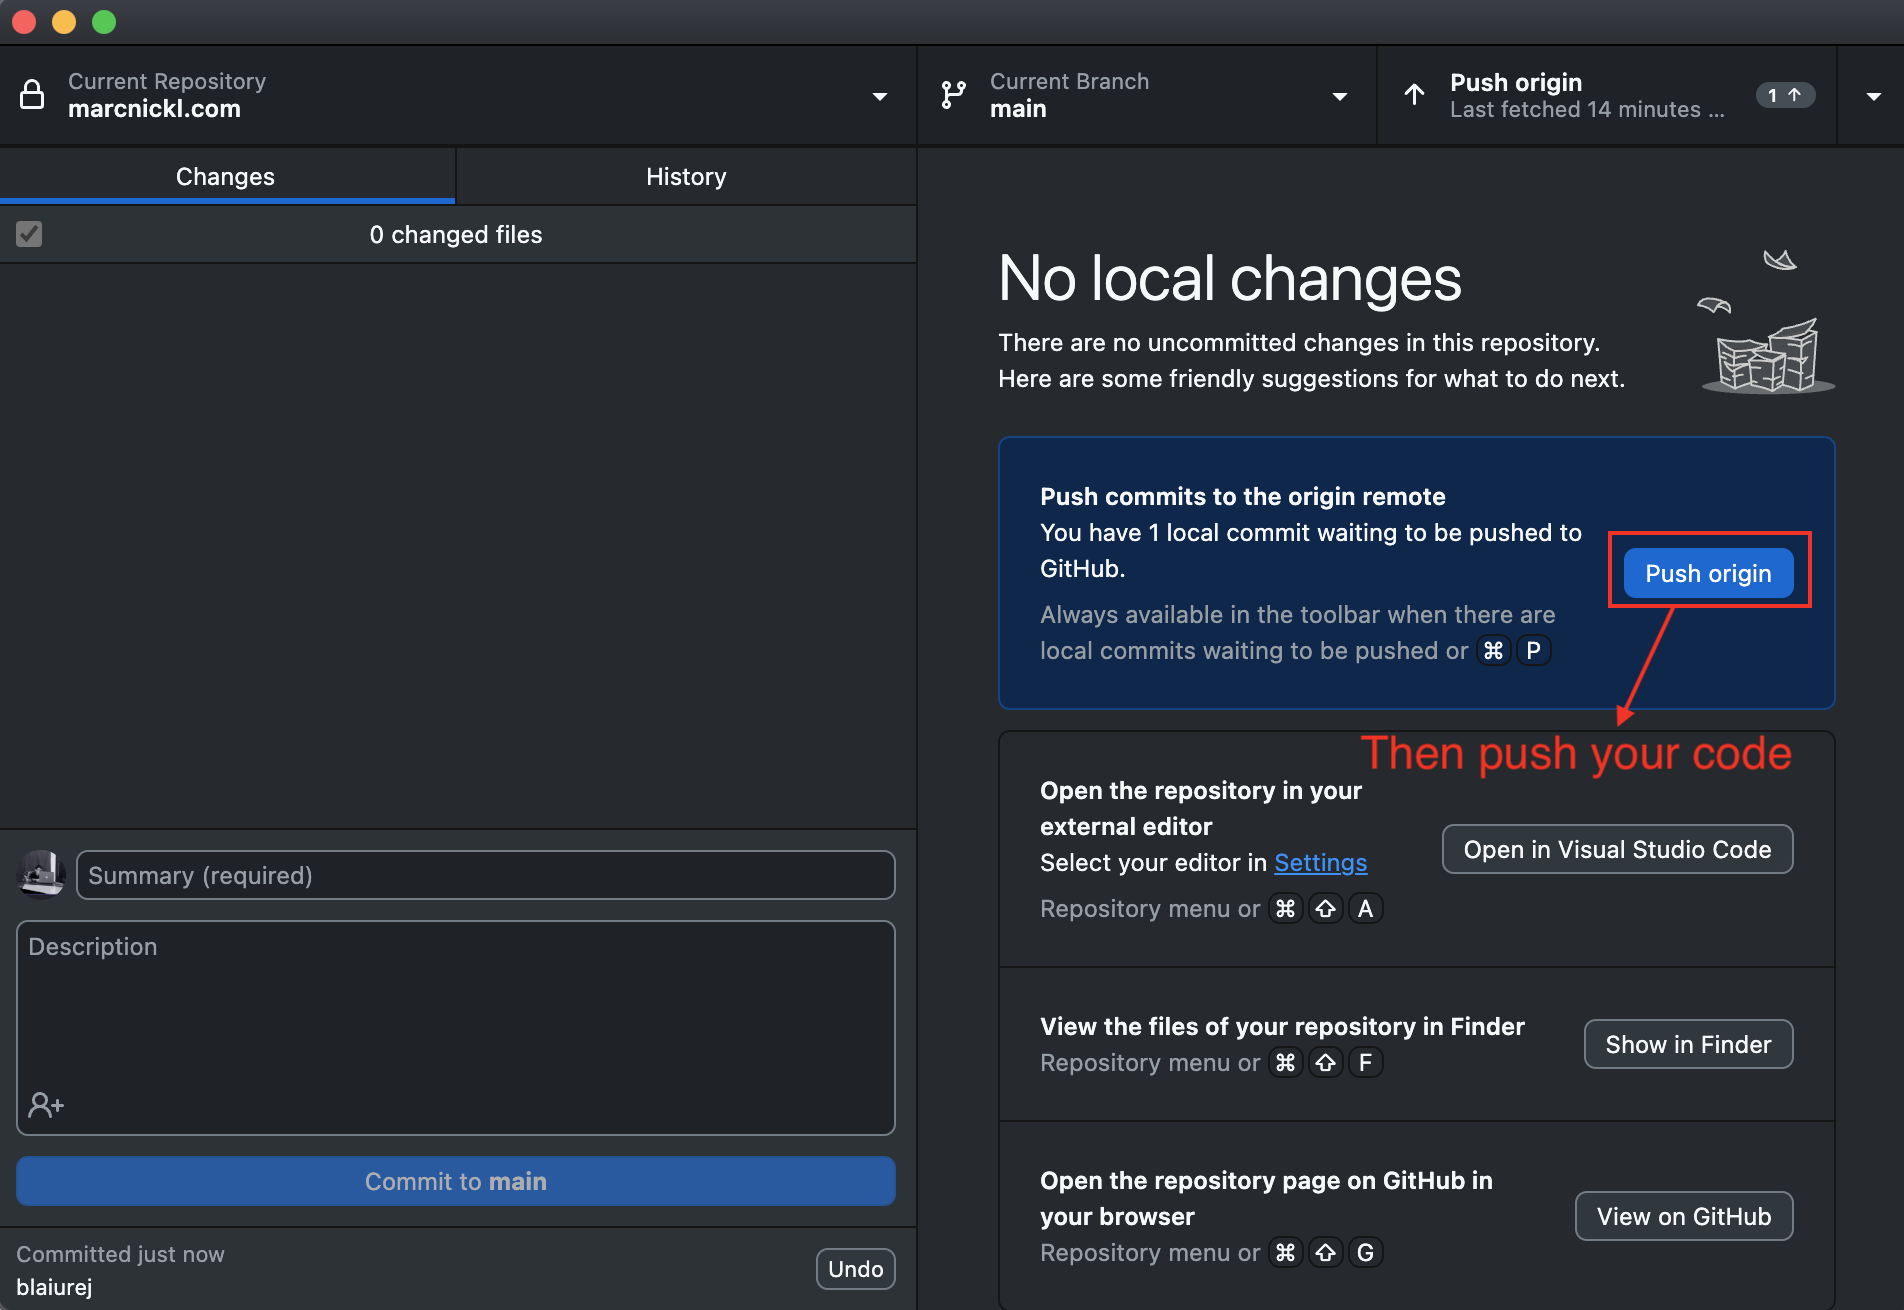
Once the code has been uploaded (or “pushed”) to GitHub, it’s time to set up Netlify. In the future, updating your website is as simple as pushing new code to GitHub—Netlify will handle the rest automatically.
Step 3 - Netify
Step 3.1 - A new Project
Step 3.2 -
- Setting up a project
Step 4 - Domains
Step 4.1 - Cloudlfare Nameserver Settings
## Step 4.2 - Adding Nameserver Settings to Netify
Tips and Tricks
- Use WebP
Bonus - EMAIL
Use Zoho mail - it’s free and you get an email address with your domain name attached
Future
I would like to spend some time working on a CMS (Content Management System) system that totally removes the need for the website builder after the initial stages.
ALSO if you the reader figures out a better workflow please get in touch i would love to make the process more optimised. 😁